FFVI - Walkthrough - WoR Part 5
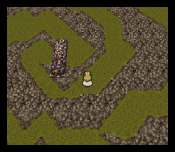
Kefka's Tower
Party: 3 groups of 4
Chests: Coronet, Fixed Dice, Minerva, 2 Tack Stars, Force Shld, Force Armor Ribbon (x2), Red Cap, Nutkin Suit, Gauntlet, Hero Ring, Aegis Shld, Megalixir, Rainbow Brsh
Additional items: Crystal Orb, Muscle Belt, Sky Render, Excalibur, AuraLance
BOSS: Atma, Gold Dragon (**DRAGON #7**), Inferno,Skull Drgn (**DRAGON #8**), Doom, Goddess, Guardian, Poltrgiest, Kefka
Espers: If you killed all 8 dragons you get Crusader
 Note: When you find the chest with the Hero Ring in it search the south wall to find a secret passage to a room where a chest is that contains an Aegis Shld.
Your 3 groups will land in 3 different areas of the tower. Each group will be designated as follows: G1 will be the group that landed on the left side of the tower, G2 will be the group in the middle, and G3 will be the group on the right. You start as G1.
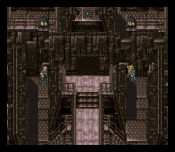
G1: Go around to your right and get the chest then enter the little hatchway to your left. Continue on this path until you come to a dead end. You should see a switch and a chest on the other side of the room.
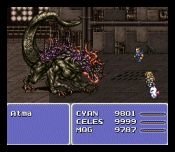
G2: When you have to choose between going up and down, go up first and get the treasure then go down. Going down will lead to a prison. In the far left cell you'll find Atma.
| BOSS 42: Atma | |||||
| HP | 55000 | MP | 19000 | Weakness | None |
| Ultima works quite well. so use it along with the best attacks of the members of your party. Another way to do it is to try depleting its MP by using spells like rasp (it'll die when its MP is drained completely). You can use the Vanish/Doom technique on this boss. | |||||
Defeat it and it'll change into a save spot. Now go down out of the prison and continue on that path until you have to choose between two pipes. Don't go in the rightmost pipe, it'll just take you back before the prison. Enter the left pipe. Before you enter the hatchway that you find, go to your far left to get a chest. Enter the hatchway, step on the switch and get the chest, then go back up and enter the door to you right. Keep going staight and you'll reach the Gold Dragon.
| BOSS 43: Gold Dragon | |||||
| HP | 32400 | MP | 4000 | Weakness | Water |
| Don't use lightning based spells (Bolt, Ramuh, etc.). DO use Ultima, Bahamut, Flare, Meteor, etc. Using your best attacks should be safe as long as they don't involve lightning. You can use the Vanish/Doom technique on this boss. | |||||
After defeating it you will get the Crystal Orb. Now continue your journey. When you reach a room with a switch, stand on it and switch groups.
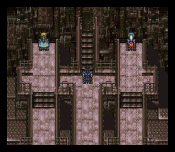
G3: First enter the hatchway that is next to the chest to get two more chests then come back and enter the other hatchway. Continue on that path and you'll eventually reach a save spot. A few more steps and you'll get attacked by Inferno, Striker, and Rough (a big ol' monster and its claws).
| BOSS 44: Inferno | |||||
| Rough | |||||
| HP | 8000 | MP | 770 | Weakness | Ice |
| Inferno | |||||
| HP | 30800 | MP | 9700 | Weakness | Lightning |
| Striker | |||||
| HP | 11000 | MP | 2600 | Weakness | Fire |
| Striker is the claw on the right and Rough is the left one. Don't worry about the claws, concentrate on Inferno. If you use Ultima, Meteor, Bahamut, or some other spell/Esper that attacks all enemies then you don't have to worry about anything. Use your best attacks. | |||||
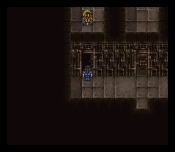
Once you've defeated them continue on your journey. When you get to a chest with a glowing thing on it, examine it to open up a passage that your other group will need to get past. Then keep going and you'll reach the Skull Drgn.
| BOSS 45: Skull Drgn | |||||
| HP | 32800 | MP | 1999 | Weakness | Fire, Pearl |
| Use fire spells and pearl as the basis of your attack. Ultima, Flare, Bahamut, etc. work good too. Cure 3 also works good. You can use the Vanish/Doom technique on this boss. | |||||
When you defeat it you'll get the Muscle Belt. If you've killed the other 7 dragons, you'll also receive the Esper Crusader. Keep going and you'll end up on the other side of the room you left G2 in. Stand on the switch.
G1: You are no longer at a dead end. Follow the path and you'll eventually reach the room your other two groups are in. Continue straight and then, after you reach the switch, pick a side to go on (it doesn't matter which). For illustrative purposes I'm gonna say go left. Now go down. Move G2 off the switch and then push the weight off the edge. Now go back inside and stand on the switch.
G2: Enter the main doorway and do what G1 did, except on the right side.
G3: Go in through the main door and step on the switch. This will open up a pathway. Go south and step on the platform to open up a couple other pathways.
G1: Go down and out to where you pushed the weight off. To your left there is a door. Enter the door and go straight where you'll find Doom.
| BOSS 46: Doom | |||||
| HP | 63000 | MP | 4800 | Weakness | Pearl |
| Use Ultima for major damage. Also use your other major attacks. Once he uses his force field, don't use spells that'll bounce off a wall (elementals, flare, etc.). You can use the Vanish/Doom technique on this boss. | |||||
When you beat it you'll get Sky Render and there will be a save spot there. Now enter the pipe to the north and stand on the switch.