FFVIII - Walkthrough - 1.3 Dollet Dukedom Parliament
| Items | 4x Potions, 4x M-Stone Piece or 2x Venom Fang, 2x Elixir, 2x Cottage, 3x G-Returner |
| Magic | Blind - 1F of Communications Tower Cure - Balamb Town, Vessel's dock Thunder - at the main square of Balamb Town |
| GFs | Siren |
| Save Points | Communication Towers |
| Monsters | Dollet Town (this period only) G-Soldier: Fire*, Blizzard*, Thunder*, Cure* Geezard: Thunder*, [Thundara*], Cure*, [Cura*] Elite Soldier: Fire*, Blizzard*, Thunder*, Scan > {Dispel} Anacandour: Fire*, Cure*, [Bio] Biggs: Fire*, Blizzard*, Thunder*, Esuna Wedge: Fire*, Blizzard*, Thunder*, Cure Elvoret: Thunder*, Cure*, Double, Siren |
1.3.1 Zell Joins In
When you return back to Garden's front gate after completing the field test, Quistis will leave your party and tell Squall to meet her in the lobby, but before to go and change into SeeD uniform. So now head for the Dormitory.
At the Dormitory, position Squall next to the bed and press the action button to choose the 2nd option. When you exit the Dorm, you will be at the Lobby where you meet a new partner...
** FMV **
 Flamboyant and hyperactive, Zell Dincht makes a dramtic appearance by doing some somersaults and karate
kicks. He will then approach Squall and Quistis.
Flamboyant and hyperactive, Zell Dincht makes a dramtic appearance by doing some somersaults and karate
kicks. He will then approach Squall and Quistis.
Squall now begins to show some of his anti-social and general great-to-be around attitude with the newcomer. Squall and Zell seem to share a dislike of Seifer Almasy. After discussing their mutual distastes, Quistis tells them that the leader for the upcoming mission is no other than the man himself. Seifer will come along with his two pals, Fuujin and Raijin, being unfriendly and rude too the group. Just as Zell wants to fight Seifer for calling him a 'chicken punk', the principal of Garden shows up, Cid Kramer. Cid will brief them their mission. After some more talking, the group will leave the lobby and head for the parking lot to get into a vehicle.
Inside of the vehicle, there is an extensive conversation between the three, Zell will keep on talking non-stop in his hyperactive nature...
Now you will be able to control the vehicle:
| Controls of Your Vehicle | |
| Square | Moves your vehicle forwards |
| X | Moves your vehicle backwards |
| Circle | Get in/out of vehicle |
| R2 | Changes the camera view |
| Select | World Map [Spot view, Side map, enlarged World Map] |
| Take Note... Cars are the basic form of transport in Final Fantasy VIII - they allow you to travel the world in safety. Note that they have a limited amount of fuel (they go much slower when you run out), so you need to refill in a town (such as Balamb Town) at regular intervals. | |
1.3.2 Relieving Dollet City
Just simply drive your vehicle to the Balamb Town and will eventually end up at a Dock. You have to enter the vessel (a submarine-like ship) (note that you can open up the Junction menu...). Inside the vessel, you will be given the mission details by a SeeD member called Xu.
BRIEF: For the past 72 hours, Dollet City has been attacked by the Galbadian army. After 49 hours from outbreak of the war, the city of Dollet has been evacuated. At present, the people are hurrying to take refuge at the outlying of mountinous areas. The troop will disembark from Kubutan Beach. Ask to eliminate any enemy soldiers. Asked to pentrate through the city and eliminate any enemy troops.
AIM: To wipe out any remaining enemy soldiers. Keep them from activating the communications system.
After the briefing, Xu will leave. Squall will decide to talk to someone.
- Talk to Quistis
- Talk to Seifer
- Talk to Zell
- Do Nothing
After this, enjoy some humourous jokes in the conversation between Zell and Seifer. After another short bit of chin wagging, head outside and you will enjoy a short FMV sequence.
This section provides a walkthrough for the Demo Disc.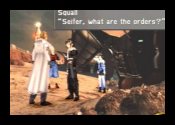
You will now take control of Squall, Zell and Seifer and all you have to do is follow Seifer. Make sure you have junctioned your 3 Guardian Forces to each character, each with Draw, G.F. and Item equipped. Split some of Quistis' magic between your characters, and be prepared to do a bit of Stocking from the G-Soldiers in battle...
Exit from the landing area and you will fight 2 Galbadian soldiers (G-Soldiers), each of them armed with swords. These two are easy to defeat, just use physical attacks and you will win 2 AP and 2 Potions. Don't forget to Draw Magic from as many foe as possible and stock it for later use. There is a possibility that you will encounter random battles on your travels, so be on your guard.
Keep following Seifer and you will encounter another 2 Galbadian soldiers, defeat them. Carry on going and you will finally reach the town, meeting another Galbadian soldier near a car and a shop called 'Noutlius'.
At the Town Square (with the fountain) another G-Soldier will attack you (1x Potion and 1 AP). Now your leader will tell you to scout for enemies; at the upper right-hand corner, you will meet another G-Soldier (somewhere near the car).
Next talk to Seifer... eventually he will comment that this mission is rather boring. Talk to Zell who is pacing around in his ever-hyperactive state. After a while, Seifer, in his boredom, starts to irritate a dog who then starts to bark (to prevent the dog from being hurt, simply talk to it!). With the dog's barking, 6 Galbadian soldiers storm over to Seifer - who will chase after them, so follow him.
Keep on heading left across the bridge (note that random battles are more frequent). Once you have caught up with Seifer, talk to the wounded Galbadian soldiers. Talk to the person crawling up the stairs, and you will fight a sub-BOSS - Anacandour...
| Anacandour | |||||||
| LV | 7 | HP | 1,178 | Mug | AP | 4 | |
| Draw | Win | ||||||
| Fire*, Cure*, [Bio] | 4x M-Stone Piece or 2x Venom Fang | ||||||
| Weaknesses & Immunities | Attacks | ||||||
| (whip), Squeeze, Dark Mist | |||||||
|
Not particulary tough as you can draw healing magic from him.
Just use your G.F.'s as much as possible (Use GF Shiva with the "Boost" ability
for more damage). Beware of his Dark Mist attack
as it does a massive amount of damage + poison-status effect (use a Remedy or Antidote to heal
affected characters). Do not use Bio (if you have the spell) on him. A Note About Seifer... Seifer is quite different from the 'standard' characters - he can unleash his Limit Break even if his HP is only 40% of his total. He has a gunblade trigger just like Squall, so just keep on tapping R1 while he is generating the energy field. This is perhaps the last battle that you can use Seifer Almasy... |
|||||||
Continue up the stairs and head for the Communications Tower and you will see 3 Galbadians Soldiers talking about a huge monster that resides there... with your colleagues taking cover. As Seifer leaves, you will see an FMV sequence:

** FMV **
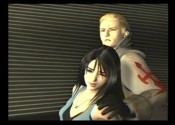
A cheerful-looking girl comes forward and falls down from the steep slope and winks.
The girl's name is Selphie Tilmitt and she is formerly a member of Squad A (remember the girl Squall gave a tour of Balamb Garden?). She will jump off the cliff and start jumping and smiling. Follow her and proceed near the cliff and choose the first option and she will join your party.
Note that Selphie will have all spells that you have stocked. Junction Quezacotl to her and try to build up the compatibility.
Enter the Tower and you will find Seifer chasing out the G-Soldiers. It is recommended that you have someone with the Item command so you don't have to rely on life magic too much.
The action will switch briefly to a conversation between two characters - Major Biggs and Private Wedge. Now head inside the tower draw some magic from the Draw Point. Take the elevator (There is a Save Point located near to the elevator), choosing option 1...
** FMV **
The ground is shaken so violently that Squall can not stand upright... Biggs activates the communications.
You will now fight Biggs... who is without Wedge...!
| Biggs | |||||||
| LV | 10 | HP | 705 | Mug | AP | 18 | |
| Draw | Win | ||||||
| Fire*, Thunder*, Blizzard*, Esuna | 2x Elixir, 2x Cottage, 3x G-Returner, 1x Weapon Mon Mar | ||||||
| Weaknesses & Immunities | Attacks | ||||||
| (gunfire), (charge), Cure*, Thunder*, Protect | |||||||
| Wedge | |||||||
| LV | 7 | HP | 703 | Mug | AP | 18 | |
| Draw | Win | ||||||
| Fire*, Thunder*, Blizzard*, Cure* | 2x Elixir, 2x Cottage, 3x G-Returner, 1x Weapon Mon Mar | ||||||
| Weaknesses & Immunities | Attacks | ||||||
| No effect: Poison | (sword slash), Fire* | ||||||
| First of all you face Biggs: simply use physical attacks and magic. Once you have dished out enough damage, he will call for Wedge. Keep focusing your attacks on one of them and you will eventually meet the main BOSS of this section (note that Biggs will probably cast Cure on Wedge if both of them are low on HP, so try finish him off first). Draw Cure to maintain your character's HP, and Esuna from Wedge (stock it). | |||||||
| Elvoret | |||||||
| LV | 8 | HP | 2,872 | Mug | AP | 18 | |
| Draw | Win | ||||||
| Thunder*, Cure*, Double, Siren | 2x Elixir, 2x Cottage, 3x G-Returner, 1x Weapon Mon Mar | ||||||
| Weaknesses & Immunities | Attacks | ||||||
| Weak: Wind; No effect: Poison | (claw swipe), Thunder*, Fire*, Mist Breath | ||||||
|
Notice that when you Scan, its Defensive stats are very low.
Because of this, Limit Breaks are the key to success! Draw
the Guardian Force Siren and stock up
on Double. Have Selphie and Squall
as healers (draw Cure* from the BOSS).
Selphie Limit Breaks are very strong when it comes to offense or defense. Use Squall's Renzokuken 2 times only (junction any 100x Fire, or another element, to his Str through Str-J) as the BOSS will use its Mist Breath which does ~100 HP to all characters. |
|||||||
 Note: I have replayed the game over and over again and found out that
you need to just to defeat either Biggs or Wedge and Elvoret will
automatically appear.
Note: I have replayed the game over and over again and found out that
you need to just to defeat either Biggs or Wedge and Elvoret will
automatically appear.
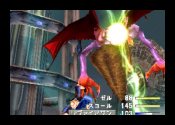
When you have finished the BOSS, you will have a short conversation. Seifer will leave and now you will have 30 minutes to head back to the sub-boat. So head to the elevator and press Circle and choose the first option. As you head down, you will see a scene of Biggs summoning a large robotic creature to attack. Back at the ground floor of the tower, save your game and use Potions to restore health before you face the giant crab.
| X-ATM092 | |||||||
| LV | 8 | HP | 5,580 | Mug | AP | 50 | |
| Draw | Win | ||||||
| Fire*, Blizzard*, Cure*, Protect | |||||||
| Weaknesses & Immunities | Attacks | ||||||
| Weak: Thunder; No effect: Poison | Arm Crash, (swipe), Ray-Bomb, Clash | ||||||
|
Well, it is pretty easy (but not easy to knock it down with such low
levels and advance spells). I have classified them into two strategies:
The BOSS' main weakness is lightning, so cast Thunder and use the GF
Quezacotl... To finish it off
quickly, summon Quezacotl along with the "Boost" ability.
Once the BOSS is down, Zell will tell you to press L2 and R2 to escape. Proceed the "Mad Run Chase" Junction Thunder to your character's Elem-Atk-J [Ifrit have that ability] Contine with the "Mad Run Chase" The "Black Widow" Strategy Beforehand preparations Defeating this guy is not impossible but you really need to level up to Level 18+. You must gotten make Mid Class Mag-RF from the Quezacotl, SumMag +20%, Elemental Attack for 2 characters and Ability with BOSS. Convert 5x Thunder to Thundara using the menu. Get 100x of Thundara to junction to Squall's Elem-Atk-J and junction 100x of another mid-class magic to his Str-J. Junction 100x Double to Selphie's Mag Stats and her affection with Quezacotl at about 900+. Have Squall under critical status (let Squall die in the battle against the Elvoret and use a Phoenix Down). At the battle, keep on using Renzokuken and have the rest using Cure to restore Squall's health at least about 240+. Continue with the "Mad Run Chase" |
|||||||
Simply make your way out back to the beach where your sub-boat is, bearing in mind you have only 30 minutes to do so. There will be an FMV sequence of X-ATM092 crushing the car as he advances through the empty streets of Dollet.
** FMV **
X-ATM092 charges down the streets of Dollet. It has knocked the building causing heavy damage. Squall falls down on the ground, quickly gets up and heads for the sub-boat. He starts running, finally making a jump for it. At this moment, Quistis pumps the crab with lead from the mini-gun. The crew escape in the sub-boat back to the Republic of Balamb
**End of Demo**
Now you are safe and sound. Back at the harbour, Seifer returns back to his normal self. His pals will come to the habour and congratulate him for the victory. Quistis will congratulate all of you for doing a great job.
Seifer, in typical Seifer fashion, drives off in the vehicle, leaving
you all on the harbour with no form of transport. Now you have to walk back to the Garden.
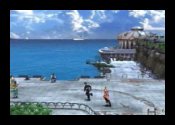
Exit the area and you will be at a cliff side path centred by an inn. The man outside will
suggest staying there to rest.
 Pay 100 gil to stay in the inn (this will automatically recover all your
lost HP). If you want to save your game, just go up the stairs and use
the save point found at the corner of the room.
Pay 100 gil to stay in the inn (this will automatically recover all your
lost HP). If you want to save your game, just go up the stairs and use
the save point found at the corner of the room.
Leave the inn and continue to leave Balamb City. There is a Draw Point here, so draw some magic. If you talk to the man sitting on the bench, you will find that he is rather familiar with Zell. There is a total of three houses here:
1st House: [on the left]: Weapon Upgrading Shop.
2nd House: [on the right]: Zell's house. You cannot enter his bedroom!
3rd House: [on the right, next to Zell's house]: There is a lady and a man talking about something.
After you are done touring the small, yet pleasant town, head up the street and you will reach the Gas Station. There you can rent a vehicle for 3,500 gil. Pick first or second to rent a vehicle OR pick the third to quit. The first option will result renting a blue-green vehicle while the second option will result renting a brown-black vehicle. You aren't going far, so it's not really worth the money. When you reach the worldmap, head back to the Garden, walking along the road if you want to avoid enemies.
At the front gate, your teamates will leave you after a hard days work and in eager anticipation for the test results.